
Click here for complete login playlist
Step-1
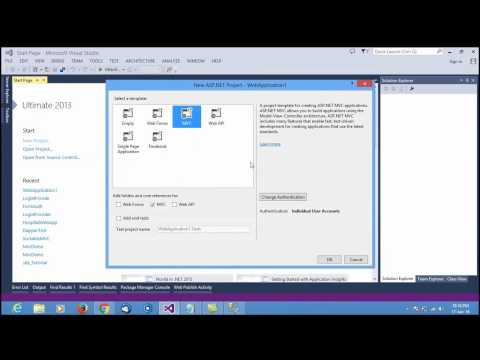
- Open Visual studio
- Click on “File”>New>Project>Visual c#>Web> then provide your project name> then select “ok”> then click “MVC”>ok.
- Go to “HomeController” and delete the default “ActionMethod” as like video.
- Go to “Views”>”Home” folder and delete default views.
- Create an Action method name “Login” into “HomeController”.
        public ActionResult Index()
        {
            return View();
        }
Step-2
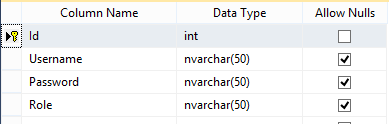
- We have already created Database(We were provide you this Database with project, the folder name “DataBase” into project.click to download the full project
- Now we will include the created database to ADO.NET Entity Framework.(It’s very easy way to use).
- Right click on folder named “Model”>Add>New Item>ADO.NET Entity DataModel>ok>Generate from database>next>New connection>Provide your SQL Server name to “Server name” textfield>Select database from “database name”>ok>next
- Expand “table”>expand “dbo”>select your created table>“finish
Step-3
- Firstly build the solution.
- Add “Login” view (to know how to add view watch the video).
Login.cshtml
@model WebApplication1.Models.tblLogin

@{
    ViewBag.Title = "Login";
}

<h2>Login</h2>


@using (Html.BeginForm("Login", "Home", new { returnUrl = Request.QueryString["ReturnUrl"] }, FormMethod.Post))
{
    @Html.AntiForgeryToken()

    <div class="form-horizontal">
        <hr />
        @Html.ValidationSummary(true)

        <div class="form-group">
            @Html.LabelFor(model => model.Username, new { @class = "control-label col-md-2" })
            <div class="col-md-10">
                @Html.EditorFor(model => model.Username)
                @Html.ValidationMessageFor(model => model.Username)
            </div>
        </div>

        <div class="form-group">
            @Html.LabelFor(model => model.Password, new { @class = "control-label col-md-2" })
            <div class="col-md-10">
                @Html.EditorFor(model => model.Password)
                @Html.ValidationMessageFor(model => model.Password)
            </div>
        </div>

        <div class="form-group">
            <div class="col-md-offset-2 col-md-10">
                <input type="submit" value="Create" class="btn btn-default" />
            </div>
        </div>
    </div>
}

<div>
    @Html.ActionLink("Back to List", "Index")
</div>

@section Scripts {
    @Scripts.Render("~/bundles/jqueryval")
}
-
Now create “Login” Post method on “HomeController”.
        [HttpPost]
        public ActionResult Login(tblLogin model,string returnUrl)
        {
            ContactDBEntities db = new ContactDBEntities();
            var dataItem = db.tblLogins.Where(x => x.Username == model.Username && x.Password == model.Password).First();
            if (dataItem != null)
            {
                FormsAuthentication.SetAuthCookie(dataItem.Username, false);
                if (Url.IsLocalUrl(returnUrl) && returnUrl.Length > 1 && returnUrl.StartsWith("/")
                         && !returnUrl.StartsWith("//") && !returnUrl.StartsWith("/\\"))
                {
                    return Redirect(returnUrl);
                }
                else
                {
                    return RedirectToAction("Index");
                }
            }
            else
            {
                ModelState.AddModelError("", "Invalid user/pass");
                return View();
            }
        }
-
Create an “Index” method on “HomeController” which will appear after success login when you use [Authorize] attribute on this method.
- Create “Index” method on “HomeController”.
        [Authorize]
        public ActionResult Index()
        {
            return View();
        }
- Create a View for index method
Index.cshtml
@using Microsoft.AspNet.Identity
@{
    ViewBag.Title = "Home Page";
}

@if (User.Identity.IsAuthenticated)
{
    <h1>Welcome user @(User.Identity.IsAuthenticated ? HttpContext.Current.User.Identity.Name : "Guest")</h1>
    <a href="@Url.Action("SignOut","Home")">Logout</a>
}
- To logout current user,create a “SignOut” method to “HomeController”
        [Authorize]
        public ActionResult SignOut()
        {
            FormsAuthentication.SignOut();
            return RedirectToAction("Login", "Home");
        }
- Now add this code between <system.web></system.web> on your web.config file
    <authentication mode="Forms">
      <forms loginUrl="~/Home/Login" defaultUrl="~/" timeout="20" slidingExpiration="true" />
    </authentication>
Now run your project and hope will work as expected,otherwise download the project and where is Database included.
Now starting role provider
Some time we want to provide access to some special ActionMethod for Admin/Editor or such like. So now we provide permission our Index method only for Admin.
Step-1
- Insert “Admin” to role column on database

- “Index” ActionMethod already have created but now update this with Roles="Admin"
        [Authorize(Roles="Admin")]
        public ActionResult Index()
        {
            return View();
        }
- Create a folder to your solution: named “MyRoleProvider”
- Create a class named “SiteRole.cs” under folder “MyRoleProvider”
SiteRole.cs
public class SiteRole:RoleProvider
    {
        public override void AddUsersToRoles(string[] usernames, string[] roleNames)
        {
            throw new NotImplementedException();
        }

        public override string ApplicationName
        {
            get
            {
                throw new NotImplementedException();
            }
            set
            {
                throw new NotImplementedException();
            }
        }

        public override void CreateRole(string roleName)
        {
            throw new NotImplementedException();
        }

        public override bool DeleteRole(string roleName, bool throwOnPopulatedRole)
        {
            throw new NotImplementedException();
        }

        public override string[] FindUsersInRole(string roleName, string usernameToMatch)
        {
            throw new NotImplementedException();
        }

        public override string[] GetAllRoles()
        {
            throw new NotImplementedException();
        }

        public override string[] GetRolesForUser(string username)
        {
            ContactDBEntities db = new ContactDBEntities();
            string data = db.tblLogins.Where(x => x.Username == username).FirstOrDefault().Role;
            string[] result = { data };
            return result;
        }

        public override string[] GetUsersInRole(string roleName)
        {
            throw new NotImplementedException();
        }

        public override bool IsUserInRole(string username, string roleName)
        {
            throw new NotImplementedException();
        }

        public override void RemoveUsersFromRoles(string[] usernames, string[] roleNames)
        {
            throw new NotImplementedException();
        }

        public override bool RoleExists(string roleName)
        {
            throw new NotImplementedException();
        }
    }
- Update “GetRolesForUser” method of "SiteRole.cs" class what I have update already on code.
- Now add this code between <system.web></system.web> on your web.config file
    <roleManager enabled="true" defaultProvider="MyProvider">
      <providers>
        <clear />
        <add name="MyProvider" type="WebApplication1.MyRoleProvider.SiteRole" />
      </providers>
    </roleManager>
- Here “WebApplication1” is my project name
- Here “MyRoleProvider” is my created folder name
- Here “SiteRole” is my created class name under the “MyRoleProvider” folder.
Now run the project and you will only be able to see the Index method view when your login username has role type Admin. Otherwise you can’t see the index method. You can test using create another username which will contain other role type rather then admin
About Teacher
Comments